The Fascinating Journey of a Jumping Spider Molting
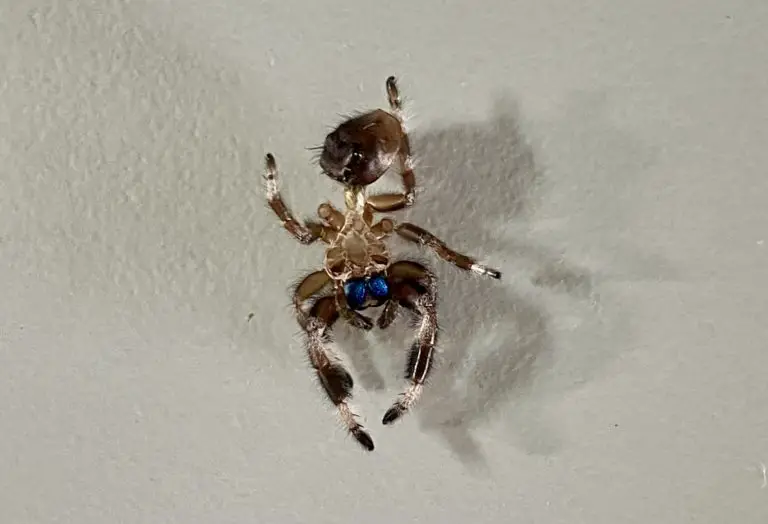
The Jumping spider molting process happens as they grow and mature and is very fascinating to view. Jumping spiders can molt between six to nine times during their lifetime. This is the process in which spiders, as invertebrates, shed their exoskeleton to allow the new, larger one to grow, which is a vital part of their life cycle.
However, the molting spider process is gradual and typically occurs in three main stages; pre-molt, during molt, and post-molt. Simply put, the jumping spider first sheds the skin on its legs, followed by the rest of its body. It takes about a week for the new skin to harden, which means the spider is vulnerable to injury during this time. Understandably, this can be a stressful period for jumping spiders.
The first molt takes place after the jumping spiders hatch but before they disperse from the egg sac. This is often the quickest molt, although the molting process can vary from minutes to a couple of hours or even days during a spider’s lifetime. For some, the jumping spider molting process will even take a week or more to complete before they emerge from their hammocks.

In the wild, if a jumping spider cannot find a safe place to hide as it molts, predators can easily spot and eat it. Even for pet jumping spiders, it is crucial to provide them with adequate hiding spots; this will help them feel much safer and reduce stress.
To understand the molting process, you need to be aware of the three Jumping Spider molting stages.
Stages of the Jumping Spider Molting Process
Pre-Molt
During this stage, the jumping spider will stop feeding, as it is preparing itself to shed its exoskeleton. This means you don’t need to be too concerned if your spider won’t eat the prey you are providing; just remove the uneaten food if no interest is shown. It is important you remove any live food that is uneaten as insects can hurt or kill your spider during molt.
You’ll notice your spider’s color darken during this time, as it stores energy in its body for the jumping spider molting process. With some molting spiders, you might also find that they avoid coming out of their hammock; they might appear less animated.
During Molt
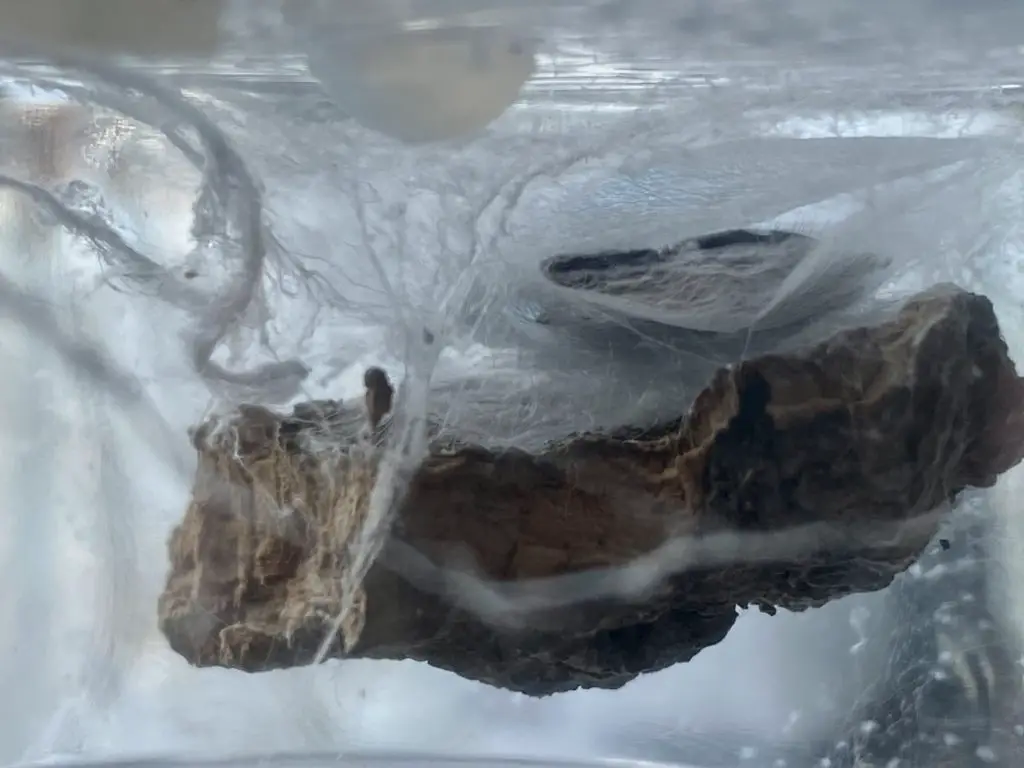
Once the spider has stopped feeding and has built a thick web (also known as a hammock), the spider molting begins. The spider will first separate itself from its old exoskeleton by creating a split between its body and legs. At this time, the spider might be curled up but not dead, as if it were in a “death curl.” If this happens, try not to panic; this is normal during molting.
After the split has been created, the spider pulls itself out of its old exoskeleton. It will then pump up its new exoskeleton with fluid, which helps to harden the new shell. The time taken during a molt can vary; it might take anywhere from a few minutes to a few hours to even a few days before it is complete.
During this time, avoid disturbing your spider; mist their enclosure away from the spider’s hammock to provide drinking water and the right humidity.
If you are interested in watching the jumping spider molting process, watch this video here.
Post - Molt
During this time, you’ll also notice that the spider is very sluggish. It will spend most of its time in its hammock and won’t be as active as usual. This is because the new shell is still soft and needs time to harden. Once the shell has hardened, the spider will have enough energy and be back to its normal self.
It is essential to remember that the spider is very vulnerable to predators throughout the entire molt cycle. Do not feed your spider until a few days after they emerge from their hammock post-molt; this is because an injury can be caused by live insects if their exoskeleton isn’t solid yet. After your jumping spider has become more active, you can begin feeding them again. They will need plenty of hydration and food to fill their energy reserves.
Once the molt is complete, the spider’s new exoskeleton might appear shiny. This is due to the fact that the new shell is filled with fluid. Over the next few days, the fluid will be reabsorbed into the spider’s body, and the new shell will become duller and harder.
As for the development time between each molt, this is known as an instar stage. Jumping spiders reach their first instar between their first and second molt, and so on. For anyone looking to buy a jumping spider, breeders will often label their available spiders as “instar five” or the applicable instar to roughly show the maturity of the jumping spider.
What can Affect the Jumping spider Molting Cycle?

The jumping spider molting process can be affected by a number of different things, including the enclosure conditions, spider’s age, diet, time of year, and species.
* Enclosure Conditions
The conditions found within the enclosure can affect a jumping spider’s molting cycle.
Simply, you should water mist the enclosure daily, keep it out of direct sunlight where no one will disturb the spider, and monitor humidity and temperature to ensure the levels are correct for the jumping spider. You should also ensure to provide them with a hide or two; this will reduce their stress when molting.
* Age
The younger the spider, the more regularly it molts. Baby jumping spiders will molt every few weeks, while sub adult jumping spiders will only molt a few times a year until maturity.
Adult jumping spiders are fully grown, so they will stop molting.
* Diet
A jumping spider’s diet can also affect the molting cycle. If a spider isn’t getting enough food – whether that is crickets, fruit flies, wax worms, or mealworms – it might not have the energy it needs to molt. This can cause the molting process to be delayed or even halted altogether.
* Time of the Year
The time of year can also affect the molting process. In the wild, most jumping spiders will molt in the spring and summer when there is more food available.
In captivity, however, spiders can molt year-round.
* Species
Finally, the type of spider can also affect the molting cycle. Some species of spiders molt more often than others. For example, tarantulas typically molt once a year, while some species of spiders can molt up to four times a year.
Signs Your Jumping Spider is Getting Ready to Molt
How do I know if my jumping spider is Molting?
There are a few signs that you can look for to tell if a spider is getting ready to molt. These include:
- Coloring might change; it might become darker or lighter.
- No longer eating.
- Becoming less active.
- Spending more time in its hammock.
If you see any of these signs, it’s a good idea to move the spider to a safe place where it can molt in peace.
What to do if Your Pet Spider Gets Stuck During the Molting process
If your spider gets stuck during molting, it’s often viewed as a lost cause; stuck molts can be fatal to spiders. But there are a few things you can do to help in this emergency:
First, make sure the spider is in a safe place where it won’t be disturbed.
Next, mist the spider with water to help loosen the old exoskeleton.
Finally, you can gently help the spider out of its old exoskeleton. Just be careful not to damage the new one. This can be a difficult step, but it is possible if you hold the partially stuck skin with tweezers and let the spider pull itself away from the old skin. It is essential you stay calm when doing this to avoid causing your jumping spider harm.

Once the spider has removed its old exoskeleton, it will pump up its new one with special fluid. This can take some time, but once the fresh exoskeleton is hard and fully formed, the spider will return to its normal self.

